
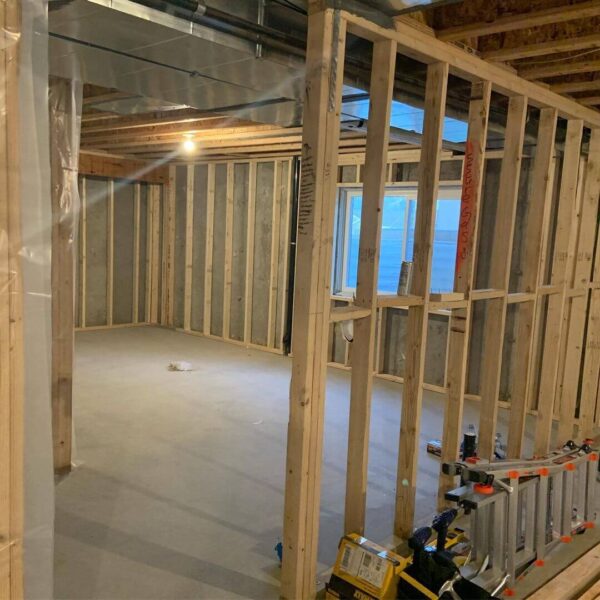
Framing basement walls against concrete, floors or other things in your basement is an important thing to do for good structural stability.
However, there are several things to have in mind while doing this and one of them is to get it right, know the things that must be in place before such a task is embarked on till completion. This will enable you to enjoy your home and have no sort of issues coming from the basement.
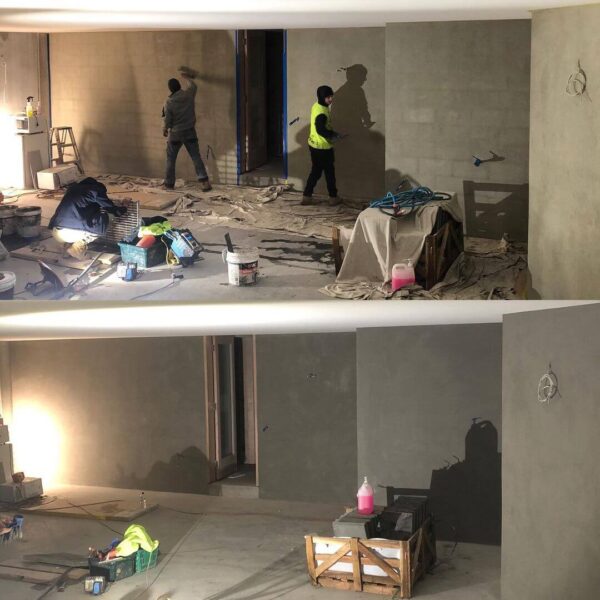
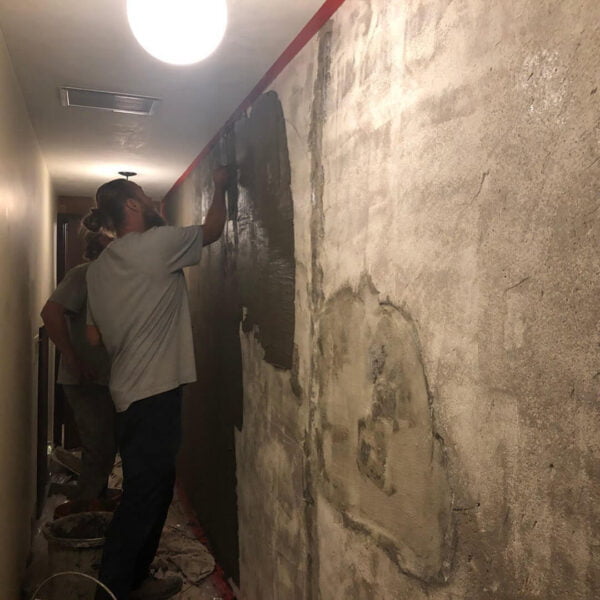
Concrete walls are good and have reasons why they are used in a house, but bear in mind that you would not be able to achieve any form of aesthetic beauty or good warm temperature from it.
Concrete walls are damp in nature and can be unappealing to the eye. Therefore, getting a concrete wall framed would give you the opportunity to add good panels or good drywalls to it and make it look better and more beautiful.
However, while trying to achieve framing basement walls against concrete, it is important to note that you have to attach some furring strips on top of the rigid foam or the vapor barrier and make a good spacing of 16 inches in a vertical form just like you do while making your studs.
This will be the best option for you to get a good and perfect framing of your basement walls against concrete. If you are unable to do this, you can still follow the process of building a real stud wall and get it covered, also make good insulation with a good vapor barrier on it.
There are certain things to know and do before framing a basement wall against concrete, we would have detailed discussions on this as we proceed with this article.
Table of Contents
Things to Do Before Framing Basement Walls against Concrete
Have Proper Check of Your Foundation
This is the most important thing to do, not accessing your building foundation very well can cause cracking’s to your basement walls and this would not be good for your home. If you have challenges with your foundation, you need to quickly get it fixed; otherwise, your safety would be at risk.
Here are some of the things that indicate foundation issues:
- Horizontal cracks
- Soft concrete
- Cracked or curved walls
- Unlatched doors
- Stuck windows
- Cracking’s on any floor in the house
- Cracked flooring
- Slanted floors
Identify Code Violations
If you have an old basement or you think your house engineer did not do good work, you would have to tackle some violation codes. This can be the absence of egress windows. Egress windows are built into the ground with a wall on the exterior part which enables an adult to easily move out from the home through the window during fire outbreaks.
Work on Tackling Water Issues
Make sure your walls, ceilings, and floors have no water leakage issues and get your piping’s well fixed in the walls at any time to avoid any form of leakages that can cause mold to the foundation of your house.
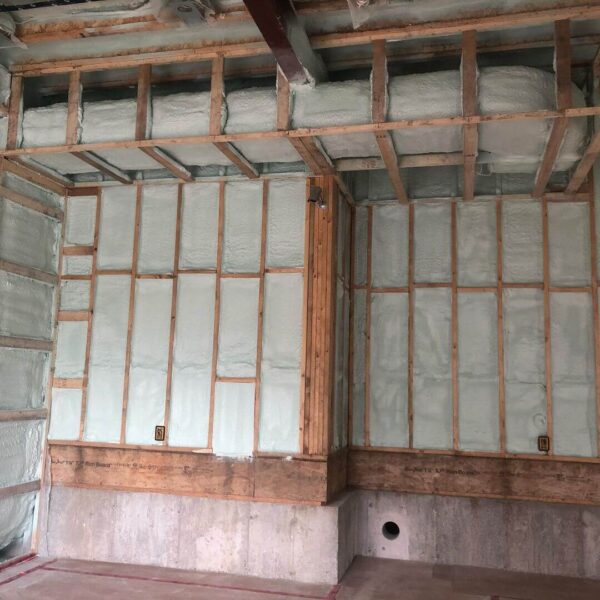
Have a Good Insulation
Do not make the mistake of using the wrong insulations for your house as this would make trash of all the efforts you made during construction.
Good insulations help you control the temperature in your house during any season. You can use either fiberglass, spray foam or any other type of insulation you know is good for your building and the environment you live in. but the best insulation to use for your basement walls is spray-foam insulation.
Take a Good Look at Your Ceiling
The height should be well considered. If it is an old house, it would not have a high ceiling. Have a good discussion with your engineer regarding your ceiling height; he will know what to do about that.
Also, take a good look at all the electrical and plumbing works that went through your ceiling. This is very important.
Do not leave them open, they must be well covered because they are necessary for the house and must run through the ceiling angle.
Do Great Work on the Design You Want
After doing the above-mentioned things, you can start up your design and have it done to the best of what you want to achieve.
How to Frame Basement Walls against Concrete
Here are step-by-step guides on how to frame basement walls against concrete:
- Make sure you find out where the joist of your ceiling is located, how they were placed and the directions they went through on the ceiling.
- If you have a ceiling that is yet to be completed and the joist is not yet covered, guess what? That makes it easier for you at this point.
- Ensure you have a stud finder, or you can just be tapping on your ceiling and get the finishing nails connected to all the sheathings if peradventure the joists are covered.
- Ensure you make your ceiling joists to be up to 16 or 24 inches and let them be perpendicular to the concrete wall you want to frame or in most cases, it can still be parallel.
- Get your ceiling or your wall well marked out to be able to identify where the ceiling joist would be connected to easily.
- Get your blocking fixed between the ceiling joists to help you nail them to walls that are parallel to the ceiling joists.
- The next thing to do is to get your ceiling sheathings or drywall depending on what you are using and cut into size (this would help you know where the ceiling is from to the concrete wall and back to the next ceiling joist).
- Get the span between the joists measured.
- Use 2-by-4 blocks to fix between every 12 inches.
- Do not cover the ceilings while nailing the joists until your framing is completed.
- Get the exact measuring length of the wall you are about to frame.
- Ensure that your readings are taken between the top, bottom, and middles parts.
- The least measurement you have here would serve as your wall length.
- If peradventure you have a longer wall than your framing boards, divide it into two or more parts and build each of the sections to be similar to each other.
- The height should be gotten while measuring the floor to the ceiling joist or the drywall you have.
- Do the same in all the places you have along the wall length and the least measurement would be used as your height.
- Remove 3-1/2 inches from the height and use what you have left as the length of each stud. Knowing that your 2-by-4 plates are 1-1/2 inches is smaller than 3-1/2 inches of the dimensions of the length, the reduction in this would give room for the thickness of the plates, and sandwiching your wall with an additional ½ inch would give room for more clearance once your wall is set up.
- Put the bottom and floor plates together with their ends flush and ensure the wide face is running vertically.
- Get it measured down to the length you have, and ensure you mark out every 16 inches.
- All the marked-out inches must be the same with the center of each stud you have, after installing it. The spacing you have is called 16 inches on the center.
- Get your stud nailed to the starting and ending parts of your bottom plates.
- Ensure the center of your stud is well fixed together with all the studs you already have marked out.
- Using a 16d nail, pin the plate into the end of the stud you have.
- Ensure you stagger the nails here to avoid your wood breaking apart.
- Ensure that your top plate is fixed at the opposite end of your stud.
- Get your foam board insulation length cut into the size of ½ inch and measure both length and width of your walls to be 1-1/2 inches when they are joined together.
- Put lines on the floor where you intend to connect the ceiling and floor materials you have.
- Get the wall tilted and put it up from the floor until they are well aligned and erected.
- Get your wall aligned to your existing wall, and at this point ensure you give a space of 1-to-2 inch between your new and old walls.
- Ensure your plumb-straight is well checked up and down using a T-square or any carpentering measurement tool.
- Move the top and bottom as necessary.
- Get your shims shoved if it is necessary, as it will help your wall to absorb any gap in between.
- Ensure you fix your foam insulation under the bottom wall plate (this is not really mandatory but it will help to stop moisture from getting to the wall).
- Ensure you nail your bottom plate into the concrete from under using a powered-actuated type of nail gun or any other fastener good for a masonry or concrete wall.
- Make a spacing of 12 inches in every attachment you have, using two at a time. Make additional support from the top plate into the ceiling joist.
- Add support along the ends of the walls in a vertical manner as you want. In some cases the supports are not too important; it all depends on what you want and how you want it to be.
- Get the lengths of your fiberglass insulation cut into size either faced or un-faced-to be exactly like the stud bays you have.
- The un-faced insulation should be fractioned or use a stapler to hold the paper facing the front of your studs.
- Close the un-faced insulation using a vapor retarder before your walls are sheathed.
- Ensure you patch your ceiling as much as you can, and finish the wall construction.
Importance of Framing Basement Walls against Concrete
- Makes your wall stable
- Helps it resist any form of blast
- Helps make it look more beautiful
- Helps prevent vapor from accumulating into water
- Resists moisture and mold on the wall if well constructed
Conclusion
Concrete walls are good but don’t look beautiful, framing your basement walls against concrete would definitely make it better and beautiful. The step by step guides highlighted above is so important to get this done. Once you follow all the prompts and carry out all the steps, you will enjoy your basement and have your basement walls look more beautiful. But if you cannot do it, it is important to call a professional to do the work for you.

Leave a Comment