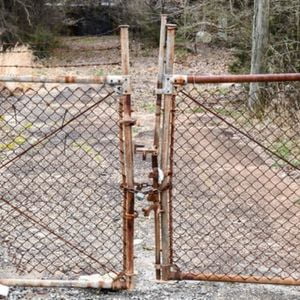
A chain-link fence is a type of fence made from galvanized or steel wire. It is made in a zig-zag pattern. It provides security, it is not expensive to install and it is durable.
Tension wires are important components of a chain-link fence. In this article, we will be considering how the installation of tension wires is done in a chain-link fence.
To install chain link fence with tension wire;
- Estimate the needed materials
- End posts should be tagged and fixed
- Intermediate posts should be tagged and fixed
- Attach the tension bands and caps to the posts respectively.
- The top rail should be fixed also
- Install the chain link mesh
- The chain link mesh should be stretched
Table of Contents
Does Chain Link Fence Need Tension Wire?
Yes, chain link fences need tension wire to complete the installation. Tension wires are very important in chain link fencing. They help to protect the bottom and top of the chain link fence to ensure that the chain links are tightly attached to the rails and posts.
How to Install Chain Link Fence Tension Wire
Installation of a chain-link fence will take 1 day normally but if the concrete is used it will take 2–3 days.
A few tools are needed to make this work:
- A shovel, digger, or spade
- Fence puller
- Post level, and
- Stretcher bar.
Also, some materials are also needed:
- The chain-link fence
- Fence ties, concrete (not compulsory)
- End post
- End post cap
- Tension wire
- Top rail
- Tension bar
- Intermediate post, and
- Intermediate post cap.
The steps needed to install a chain link fence tension wire is listed below:
1. Estimate The Needed Materials
This is where you measure the length of fencing you will need for the job. Identify the place where you want to install the corner, gate, and end posts. Mark the places with heavy ink, a piece of cloth, or anything noticeable. Measure the length between the end posts.
2. End Posts Should Be Tagged and Fixed
For the location, you chose to fix the corner, gate, and end posts, you need to create a hole in them. Use a digger, shovel, or spade to create the holes. Make sure the depressions you create are up to three times the size of the posts. Also, the hole should be as deep as a third of the post’s length.
Now the installation of the end posts. There are two ways to fill the holes, using concrete and without concrete.
If you choose to use concrete, get 5 inches of gravel and insert them into the holes. Press it down to the bottom so there is no space between them-0-. Insert 5 inches of concrete into the hole as well.
Finally, insert the posts into the holes and give it a minimum of 24 hours for the concrete to solidify.
If you choose to not use concrete, insert the pole into the depression (hole) and fill the holes with big stones to support the pole and keep it firm. Add some sand inside the hole as well to cover the spaces.
3. Intermediate Posts Should be Tagged and Fixed
Tie a rope or a string from one end post to the other end post. Ensure that your intermediate posts are the same height as the mesh’s height. This is to provide a little space at the end of the fence when it is fixed.
Observe a 3 meter spacing between your corner, gate, and end posts to easily identify where you’ll put the intermediate posts.
Just the same way you created holes for the end posts, create holes for the intermediate posts. Remember that the width of the hole should be three times more than the width of the post. The hole should be as deep as a third of the post’s length also.
To fill the holes, there are two ways to go about it as well. Using the concrete or without the concrete option.
If you want to use concrete, add 5 inches of gravel into the hole. Press it down to the bottom so there is no space between them-0-. Insert 5 inches of concrete into the hole as well. Finally, insert the posts into the holes and give it a minimum of 24 hours for the concrete to solidify.
If you do wish to use concrete, insert the pole into the hole and add a lot of large stones to it. Fill it up with those stones and add sand to it.
4. Attach the Tension Bands and Caps to the Posts Respectively
Attach the tension bands to the posts one after the other. Do this in a way that the flat side will face the outside of the fence.
Use 2 x tension bands on the corner posts for each side. If your fence is 5 feet high, you will need 4 tension bands. If it is 7 feet high, you will need 6 tension bands. That’s how it works.
Attach all the caps to the posts. Ensure that the caps with loops are used for the middle posts and the caps without loops are used for the end posts. After this, tighten all the nuts, bolts, and everything else.
5. The Top Rail Should be Fixed
This is a simple step to follow. Move the top rails by pushing them through the loops. The poles will connect together using their opposite ends.
The length of the poles should not be too long, if it is, you can reduce it with a saw. After attaching the poles, tighten all the loose bolts and nuts.
6. Install the Chain Link Mesh
At one of the end posts, begin to unroll the mesh across the fence. Intertwine the tension bar at the bottom of the mesh roll that is close to the fence.
Also, put in place the tension bar at the bottom tension band of the pole. Ensure that the mesh is 2 inches away from the ground. When you’re done with that, get a few wire fence ties and place the mesh on the top rail.
7. The Chain Link Mesh Should be Stretched
Place a tension bar 3 feet from your end post. Connect the tension bar with a stretcher-bar. Use the fence puller to connect with the stretcher bar and move the tool until the mesh is tightened enough.
Use the plier to remove all the excess mesh on the fence. Remove the tension bands and other things that you do not need anymore.
This is how you can successfully install a chain link fence tension wire. You can also learn how to install chain link fences on uneven ground.
What is Tension Wire Used for in a Chain Link Fence
The tension wire is used as a bottom material along a fence. It provides structural functions as well as aesthetic functions. It can be used to prevent animals from gaining entry into a place.
How Do You Tighten the Bottom Tension Wire on a Chain Link Fence?
When you want to tighten the tension wire, make use of a turnbuckle. Use it to firmly tighten the tension wire. A few people have also made use of large pliers and hammers in tightening the bottom tension wire and it worked just fine.
How Many Tension Bars Do I Need for Chain Link Fence?
The quantity of tension bars you will need for a chain leek fence depends on the height of the fence. It is recommended to use one less tension band than the height of the fence. For example, if your fence is 5 inches high, you will need 4 tension bands.
Conclusion
The security of your house is of utmost importance to you. Chain link fencing provides a form of security you need in protecting your home. It also provides aesthetic features and shields your grounds from intruders (animals or humans). It is important to know how to install the tension wires in a chain-link fence. I hope this article will be of great help to you!